I highly recommend it! I've done it a few times now with various classes/age groups and it produces equally lovely results and discussions each time regardless of the class you teach. (Although I suppose it is better for KS1.)
For those of you not familiar with journal sticks, here is how I have used the idea in the past. I found it easier to gather the sticks prior to the lesson (particularly when working with younger children) to avoid the children choosing sticks that 'won't work very well', i.e. Not strong enough, too big/small, too dirty, etc. choosing them yourself allows you to choose appropriate sticks for your class. I tend to use sticks around 12 inches long. What's nice about this activity is that all the sticks will be different, and so will the end products.
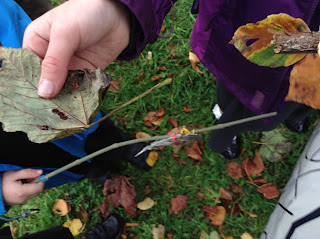
It's a lovely Autumn time activity. The idea is to take your children on a nature walk. This be be in school grounds if you are lucky enough to have a wooded area, or at a local park/nature spot. How you want to 'focus' the children's learning and exploring during this is up to you. If done it in a few ways... Staying together as a class, going round in small groups, giving the children free reign to explore if the area allows. The idea is that the children can find unusual/interesting/colourful/pretty/autumn specific objects as they walk. (Leaves, small twigs, seeds, conkers, feathers, flowers...) This is a good opportunity to address Nature Rules with the class. e.g. Do not take anything living such as insects or remove leaves or flowers from a living plant. Collect items that have already fallen from the tree/plant to the floor. Also, no fingers near faces throughout the activity! Explain the hygiene/safety importance of this clearly to the children and encourage questions throughout. If they are not sure what something is or if it is safe they should check with an adult first. Theses are just a few examples of Nature Rules I used but there are lots about on the internet you could share with the children before you set of on your nature walk.

When the children are collecting items for their journey/nature stick to record their explorations there are two different ways that I have done this. 1) Each child take their stick round with them with several small elastic bands attached to it that they can use to 'tie' their items to the stick as they explore. Or 2) Leave the sticks in class and provide each child with a small paper cup to collect their items in as the explore. This is a good way to do it with younger children as they can find the elastic bands tricky. Then the children can bring their cups filled with nature back to class and build their nature sticks in the classroom using PVA, Blutack, etc. This is quite a nice way to do it as the children with naturally start to discuss their explorations and the objects they collected as they are building their journey sticks, which has learning and development benefits in itself.

Use sticky labels to put names on the sticks, as the children should be proud of their work and will likely want to take them home at a later date.


It is beneficial to display the completed journey sticks in class somewhere. They could go in an outdoor provision area, but I think it's nice to also have some nature inside the classroom as well. There are so many different ways that can be displayed! However you choose to display them, make sure they are somewhere that the children can examine them closely and preferably touch them too. They are extremely tactile and even if things fall off they can be easily fixed! Encourage the children to explore and interact. You could even leave post-it notes for the children to draw or write a response to the journey sticks. Interactive art :)
Last time I did this I also created a journey stick sign for the classroom door using the same method the children had used. It was a way of sharing our learning with other children in the school and encouraging my class to take pride in their work and want to share their nature exploration records with others.
There are so many ways that this activity can be used and/or adapted! I'd love it if you could let me know what you think in the comments box. Please read / comment / share... thank you.
Enjoy :)
Miss M xx


